Setup
Enter an email address, and then download WowSlider here.
Save the .zip file to your desktop.
Once the file is finished downloading, double-click to unzip the .dmg file.
Open WowSlider by double-clicking the icon.
Adding Images
Add images via drag/drop. Click on each image to add captions (and title, if necessary).
Customize Settings
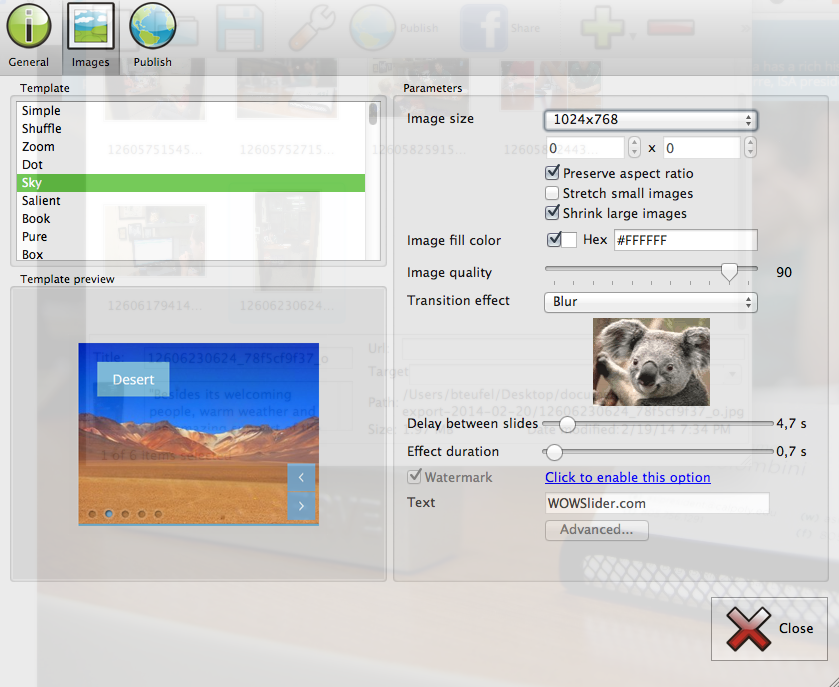
Click the wrench icon at the top of the window, and adjust your settings to match those in the screenshots below. Choose any ‘transition effect’ and designate ‘Image Size’ based on the width of your smallest horizontal image.

 Publishing
Once customized, export your photo slider by clicking PUBLISH > PUBLISH TO FOLDER (export to a new folder on your desktop called ‘gallery’ — see screenshot).
Open the new folder on your desktop, find the generated ‘index.html’ file (not ‘iframe_index.hmtl’) and open this in Dreamweaver (hold down CNTRL, click the file and select ‘Open with’ > DW).
Copy all the WOWSlider code from the page’s ‘Head’ section, and paste it inside the ‘Head’ section of the DW page that will house the slideshow (ex. in the screenshot below, copy all the code highlighted in green (from the WOWSlider-generated ‘index.html’ page, and paste this into your own ‘index.html’ page)).
It is important to realize that you now have TWO style sheets attached to your index.html page. You must add title attributes to the style sheet link in order to avoid mixups.
Setting the title attribute makes a style sheet the author’s preferred style sheet (i.e. your original style.css file). Ex:
<LINK href="mystyle.css" title="main" rel="stylesheet" type="text/css">
Adding the keyword “alternate” to the rel attribute designates an alternate style sheet. Ex:
<LINK href="mystyle.css" title="wow" rel="alternate stylesheet" type="text/css">
Add titles and alternate IDs to the code in the header section of your index.html page. Make sure both lines of code are indeed in the header section!
Next, copy all the WOWSlider code from the page’s ‘Body’ section (see screenshot).
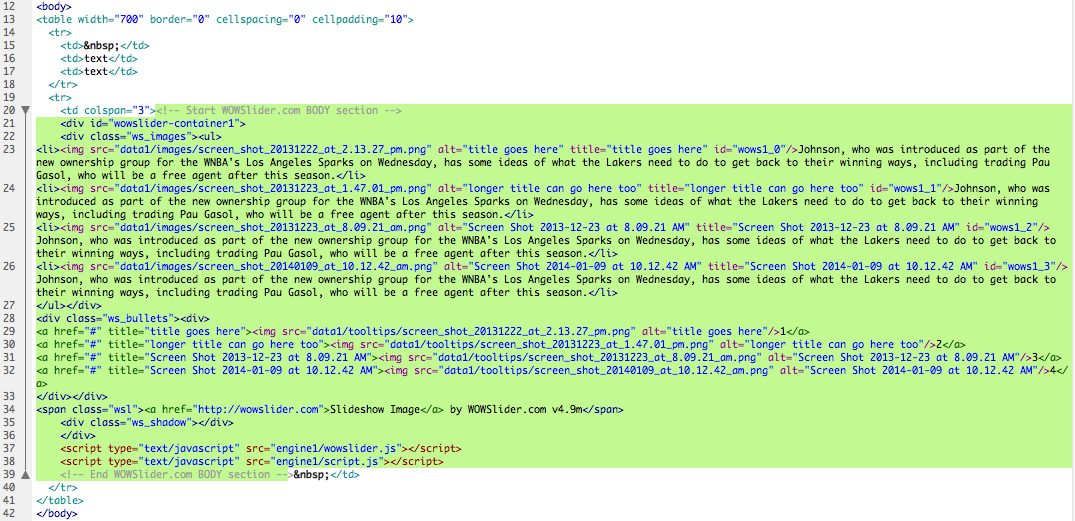
In DW ‘Design’ view, place your cursor inside a table cell on your page, switch to ‘Code’ view and paste the code you copied during the previous step.
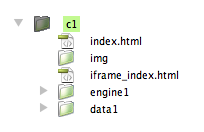
Next, copy ‘data1’ folder and ‘engine1’ folder and ‘iframe_index.html’ into the SAME FOLDER as the webpage your aiming to insert the gallery in (do not move the WOWSlider ‘index.html file’, create a new folder or place these items inside the existing ‘img’ folder).
Example of a correct file structure:
 *You can also change the style of the templates. Find the generated ‘engine/style.css’ file and open it in any text editor.
4. When finished, upload/put all the contents of the folder containing your index.html page.